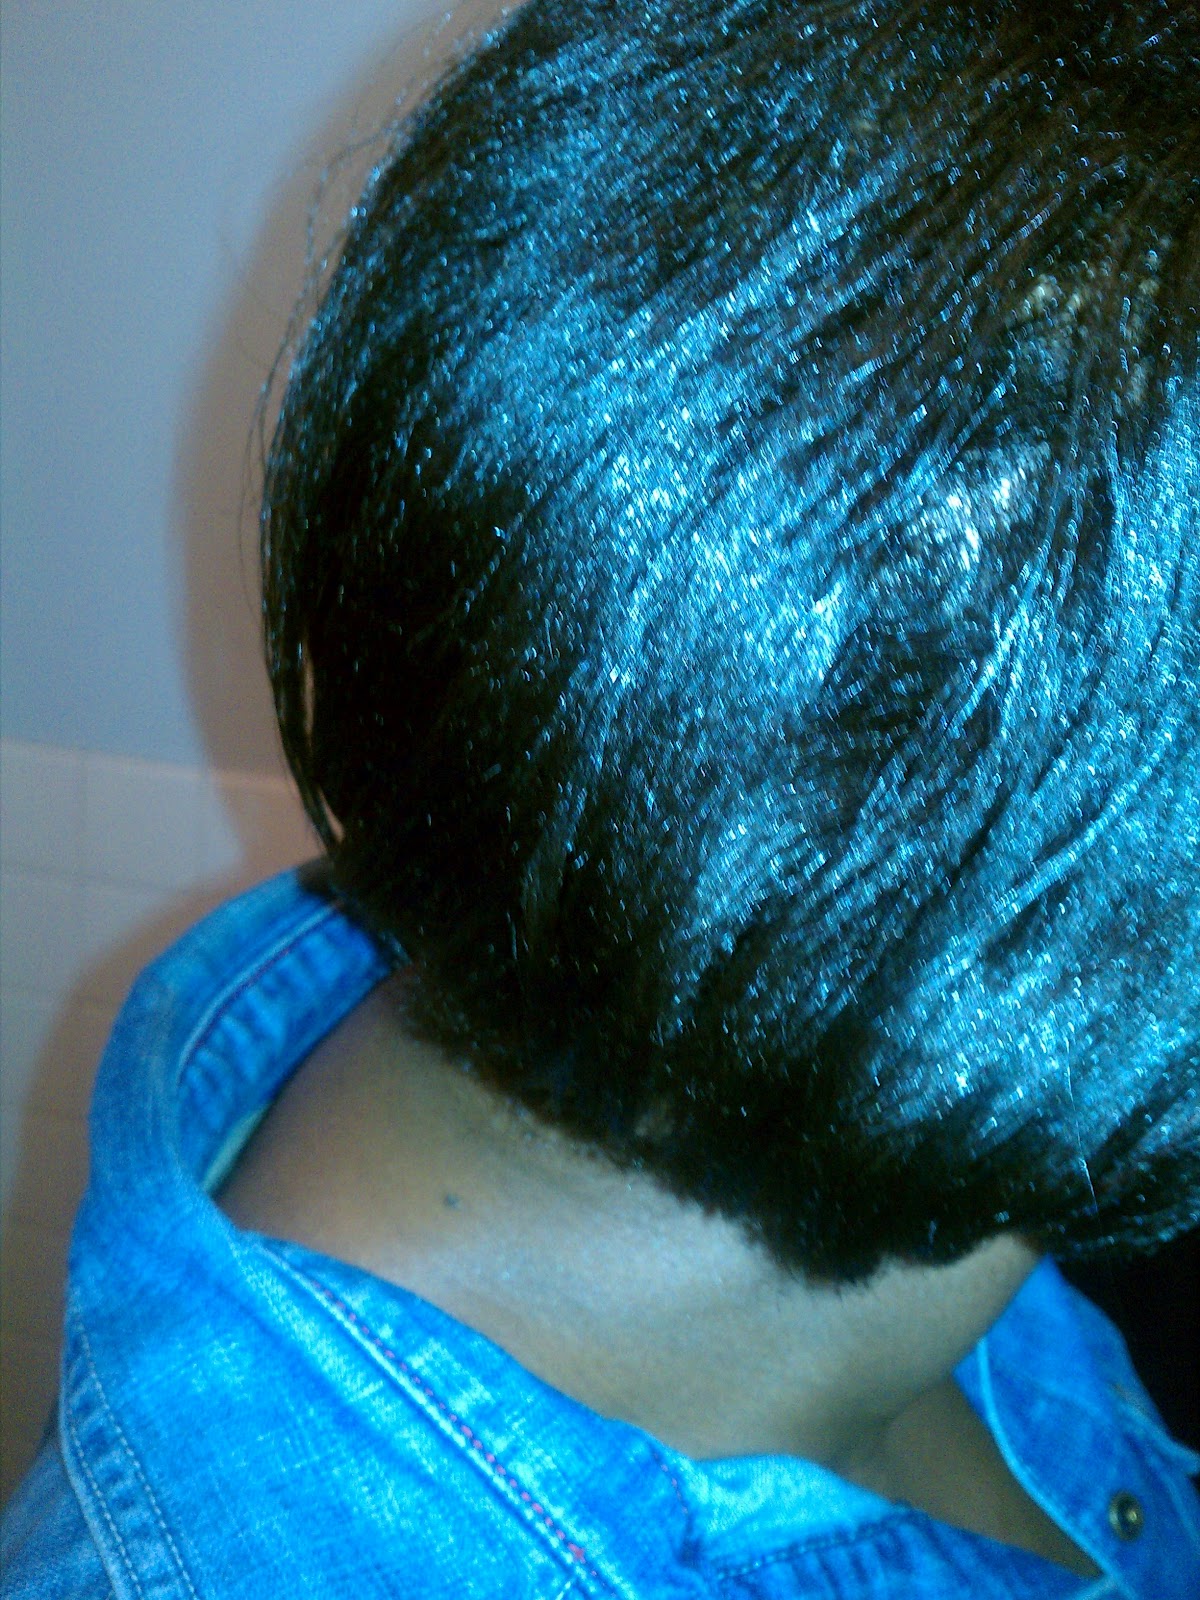
My hair is doing what it do! Growing nicely, getting that health up and turned up off my regimen. I have been super consistent with my regimen and my hair is saying THANK YOU (finally) and I'm basking with unlimited selfies. I never loved my tresses, even when it was relaxed. I feel like we always just put up with each other but neither one of us put our best foot forward to make each other shine. Now, we're besties, I understand my tresses and my tresses understand me and with that I found a regimen that is giving both of us LIFE.
My regimen right now is
1. First week: deep condition with coconut oil with heat for 45 mins then co-wash
2. Second week: Shampoo, ACV, Deep condition anywhere from 30mins - 2 hours with heat.
3. Third week repeat First week
4. Fourth week repeat Second week.
So in a nut shell I alternate weeks between a co-wash and shampoo.
I'll have more deets on products that I use, but in the mean time I just wanted to breeze through and show yall what I'm working with.
Pic on the left is my hair Nov 2012 pic on the right is my current hair Sept 2013
Thought I capture a few selfies cuz I need yall to believe me when I say me and my tresses are besties. My first twist out that I actually was digging. It was juicy and coily!
Do you have a regimen? Please share.
Follow me on instagram for pics before they hit the blog @trackingmytresses
Showing posts with label hair regimen. Show all posts
Monday, September 16, 2013
Tuesday, September 4, 2012
I've Been Nominated & I'm Hyped! I Would Like to Thank My Mama....
Shout out to Vee at Growing in Style for nominating my blog for the Versatile Blogger Award! I feel like I hit the lotto or something and I want to give one of those "I've made it speeches" they give at the award shows. "I would like to thank God, the author & finisher of my faith, My mama for telling I always had it in me" LOL. I, know, I'm a cheesy lame, but I do feel quite honored though *tee hee* I had a cah-razy labor day weekend with emotional highs & lows, ups & downs but this cheered me up a great deal--adding to the highs and ups of my insane weekend.
In order to accept the award, I have to follow some rules. The rules are:
1. Thank the Blogger that nominated me.
-- did that! Thanks again Vee for spotting me and giving me the L.O.V.E. 'preciate!
2. Share 7 random facts about me.
--I'm sort of weirdo so get ready lol
3. Nominate 15 bloggers who are relatively new to blogging. -- I've become a recent blog stalker so I have a few on my list...
4. Let nominated bloggers know they have been nominated.
-- *drum roll* please.....
5. Add the Versatile Blogger Award to my post.
-- I'm so excited I feel like printing it, making a button and pinning it on my shirt. :-)
7 Random Facts about Moi!
1. I am deathly afraid of needles. My grown, rusty behind goes into a big ball of tears, just like a baby, when that itty bitty needle has to be put in my arm to draw blood. I know, I know, I'm a complete loser but I just can't deal.
2. I can veg-out watching the Food Network alllllll day. Catch me on a rainy Saturday, chile please, I will keep it locked on the Food Network and won't miss a beat. Then what happens is my Sunday dinner is Food Network inspired. lol
3. My alarm clock is set 20 minutes early than the real time and is set up across the room so I have to get out of bed to hit snooze. I thought this would benefit me somehow with getting to work on time because I have to get out of my bed to hit the alarm. However, when my alarm goes off, I know I'm 20 minutes ahead of the game and I get out of my bed to hit off to only get back in bed again the end result is I'm late for work as usual even though I have this whole preventive-routine not to be...SMH. crazyness I tell you!
4. I went to Catholic school, but I am not Catholic and NOBODY in my family is! My mother just thought I would have a better education going to catholic school than public. I went the mass services but could not receive communion.
5. I am a former thumb sucker and wore braces for three years because of it.
6. My mother put me in drama classes as a child because I was really good at imitating people. I'm still good at it until this day, but never thought of becoming an actress.
7. I have no cavities but bought multiple bags of candy as kid and ate them every single day. I still don't understand how I have all my teeth.
Ok the nominees are (in no particular order). I know this was for new bloggers but I do have a 1-2 veterans on this list only because I stalk their blogs regularly and enjoy them a lot.
2. blutifulblaqhair
3. wurassecrethair
4.fancyflairlady
5. http://napturallyinspired.blogspot.com/
6. http://curlyknots.blogspot.com/
7. http://liloreochick97.blogspot.com/
8. http://beautywitchsrealm.blogspot.com/
9.http://hisocietynyc.blogspot.com/
10. http://businessaboutbeauty.blogspot.com/
11. http://jennashair.blogspot.com/
12. http://finetexturedhair.blogspot.com/
13. http://sweetcme.blogspot.com/
14. http://thehairmuse.blogspot.com/
15. http://theawkwardstage-se.blogspot.com/
Friday, August 17, 2012
Hair Journey CONFESSION #1
The bad news is the summer is whisking away rather rapidly.
The good news is I'm alive and in good health.
The hair news is I'm in a protective style. I am wearing wig cap. It's my go-to when I don't want to be bothered with my hair. The difference with wearing them now is I take much better care of my hair, than when I wore them before my hair journey (HJ).
Confession #1 - I started this blog with the idea to grow out my short cut and my relaxer at the same damn time (shout to 2Chainz!). Well, yeah um, what had happened wuz.....I got frustrated with the two textures and did not know how to control it, so I texturized my hair. I experienced some breakage during the process and that's when I said something has got to give. My stylist suggested a texturizer. At first I was like, "wait does that mean I'm going to have a like a jheri curl type look?" Hey I'm an 80's baby so that's my definition of a texturizer, but she broke it down for me and said a relaxer straightens the curl pattern and a texturizer softens the curl pattern. She was the one to convince me to give up perming but she also convinced me that texlaxing will be helpful with transitioning out, since I was struggling with the growing out phase a lot. So, the ultimate goal of going natural is still very much there, BUT I'm going to wean my way out of the transitioning phase by texlaxing.
Although, a texturizer can make your hair bone straight like a relaxer if you let it sit long enough, however, the applying time is way shorter than a relaxer so the results will not be bone straight. In the hair world, its called texlaxing. You can achieve a texlax by using a no-lye or lye regular relaxer by cutting your applying time in half OR you can achieve a texlax by using a texturizer.
The actual definition of texlaxing is the process of purposefully under processing one’s hair in order to loosen the texture of the hair without completely straightening it. This method is less damaging and leaves the hair thicker than a relaxer.
Texturizing is still a chemical process, but I must admit I like it waaaaaay better than relaxing, for my hair at least. The texturizer my stylist used is Linange Shea Butter Texturizer. She mixed it with a little conditioner and an oil.
Here's why I love my texlaxed hair:
1. The chemical does not stay in my hair that long literally under 5 mins. How my stylist applies it is she parts in four sections BUT she is working on each section separately. For instance, you know when you are relaxing and your hair is parted in four sections and you work on section by section but you rinse out the relaxer when all four sections are completed. Well, my stylist applies to one section and then rinses out that section and on to the next one. I love how she does it. Less prone to overprocessing, it's easier on my tresses and my hair is not bone straight. Luvs it!
2. I love having a bit of a texture. My hair looks fuller because it is not bone straight the texture adds some fullness and body to my hair.
3. Healthier tresses. yes yes texlaxing is a chemical process but a less-stressing applying process. When I would get relaxers I would do this over dramatic fake my-scalp-is-burning act with fanning my hands and tapping my feet and all, in order for the stylist not to relax to bone straight. Ask me why I went through all that trouble to put that act on because it was the only way the stylist would get it out of my head. Now, I have a totally new stylist who understands my tresses and the importance of the chemical process so that act I have retired.
Are you texlaxed?
Monday, June 18, 2012
Organic Root Stimulator Uplifting Shampoo. A Review!
My hair was thriving, then it was like the life got sucked of it. I was hating my hair for a few weeks almost at the verge of chopping it all off (again). Straight up hair frustration because my hair would not shine at all no matter how much moisturizing & sealing or co-washing I did. My rollerset would not last long and it started to look weighed down and I was experiencing some excessive shedding. I couldn't figure out if it was the products I was using or was I doing to much or what? Then a light bulb hit. WELP, I DO NOT CLARIFY MY HAIR.
The point of clarifying is stuff builds up on your hair, all kinds of stuff. Hairsprays, mousses, and gels; hard water and mineral deposits; chlorine and chemicals from swimming pools; even the waxes and moisturizers in some shampoos and conditioners can leave build up on your hair over time. This build up can cause hair to appear dull, heavy, greasy, and limp. A clarifying shampoo can help remove those deposits, give your hair a fresh start, and restore shine.
I pre-poo (a pre-treatment with oils/conditioner before shampooing your hair) weekly and recently started incorporating co-washing (washing hair with a moisturizing conditioner) into my regimen, although they are great techniques for the hair, you eventually have to clarify at some point due to product build-up. So, off to the beauty supply store (BSS) I went to pick up a clarifying shampoo.
Anyhoo, I wanted to make it easy for myself with the decision making so I purchased Organic Root Stimulator Uplifting Shampoo. Anytime I buy a product from this line, I am always pleased and impressed so I figured I couldn't go wrong. And I didn't.
First of all, what a big difference clarifying makes, I never knew! Honestly, this was my first time ever using a clarifying shampoo, since starting my HJ back in January, and I must say my hair does feel lighter, cleaner, silky AND no itchy scalp. I plan on adding clarifying to my regimen by the fifth wash.
The Facts:
This shampoo exfoliates the scalp helping to relieve the itchy feeling associated with dry scalp. It's ideal for all hair textures, and adds moisture while helping to condition and detangle.
The Instructions:
The Truth:
Bottom line, hands down, Organic Root Stimulator is winning as far as product lines for me. I always get great results from their products. I'm a trusted fan! The ORS Uplifting Shampoo is surely a staple for me as my clarifying shampoo. If you don't believe check out one of my fav youtubers MrGORGEOUSisMYname who also reviewed this product. He had me LOL'n!!!
What do you clarify with?
The point of clarifying is stuff builds up on your hair, all kinds of stuff. Hairsprays, mousses, and gels; hard water and mineral deposits; chlorine and chemicals from swimming pools; even the waxes and moisturizers in some shampoos and conditioners can leave build up on your hair over time. This build up can cause hair to appear dull, heavy, greasy, and limp. A clarifying shampoo can help remove those deposits, give your hair a fresh start, and restore shine.
I pre-poo (a pre-treatment with oils/conditioner before shampooing your hair) weekly and recently started incorporating co-washing (washing hair with a moisturizing conditioner) into my regimen, although they are great techniques for the hair, you eventually have to clarify at some point due to product build-up. So, off to the beauty supply store (BSS) I went to pick up a clarifying shampoo.
Anyhoo, I wanted to make it easy for myself with the decision making so I purchased Organic Root Stimulator Uplifting Shampoo. Anytime I buy a product from this line, I am always pleased and impressed so I figured I couldn't go wrong. And I didn't.
First of all, what a big difference clarifying makes, I never knew! Honestly, this was my first time ever using a clarifying shampoo, since starting my HJ back in January, and I must say my hair does feel lighter, cleaner, silky AND no itchy scalp. I plan on adding clarifying to my regimen by the fifth wash.
The Facts:
This shampoo exfoliates the scalp helping to relieve the itchy feeling associated with dry scalp. It's ideal for all hair textures, and adds moisture while helping to condition and detangle.
- Enriched with menthol, nettle and horsetail
- Gently lifts flakes and excess oils
- Stimulates and irrigates scalp
The Instructions:
- Conduct a patch test for allergic reaction before use. Apply as directed to the nape of the neck; wait 24 hours. If itching, bumps or redness develop, do not use
- Apply a generous amount of shampoo to damp hair and work into a lather. Rinse thoroughly
- Repeat shampoo, leaving on for 2 minutes to maximize treatment
- Rinse thoroughly with warm water and condition with Organic Root Stimulator hair mayonnaise
The Truth:
- First off, no allergy reaction for me, thank God. I'm never allergic to anything so I was pretty optimistic about not having some sort of reaction.
- Loved the tingling sensation it gave while washing, made me feel like it was really doing something
- Clarifying shampoo's are known to strip the hair to release the build up, but for this to be a clarifying shampoo my hair did not feel stripped it actually felt moisturized and stronger.
- I will say that my hair also behaved with holding rollerset curls. By day 2 of a rollerset my curls are lifeless.
- It definitely did the trick to my tresses they were lighter and shinier and my scalper is definitely cleaner. I usually have itching scalp and I haven't scratched my scalp going on 2 days. Impressive!
Bottom line, hands down, Organic Root Stimulator is winning as far as product lines for me. I always get great results from their products. I'm a trusted fan! The ORS Uplifting Shampoo is surely a staple for me as my clarifying shampoo. If you don't believe check out one of my fav youtubers MrGORGEOUSisMYname who also reviewed this product. He had me LOL'n!!!
What do you clarify with?
Friday, June 8, 2012
Co-Wash Day
So yesterday I co-washed, I rarely ever co-wash, but I want to get rid of my Creme of Nature Nourishing Conditioner. I'm really not feeling it as a deep conditioner (DC) so I'm trying to find ways to get rid of it, so I co-washed with it yesterday. I must say, it was not bad -- at all! I've tried co-washing before and I didn't fall in love with my hair like most of the rave reviews on these hair sites, but CON Nourishing Conditioner did a really good job. My hair feels uber soft and manageable and I like it! My hair doesn't look moisturized as I thought, but it certainly feels like it though. If that makes sense?
So I used the CON Nourishing Conditioner, my last wash I let the conditioner sit in my hair a bit while I got so fresh and so clean. Rinsed with coolish-warm water.
Aphogee Keratin & Green Tea Leave In (my hair loves this)
Jamaican Black Castor Oil for my scalp.
My hair was amazingly soft almost like baby hair soft. I thought I was Indian for a second. lol. It was soooo manageable, and I have a lot of new growth happening. I added some aloe vera juice and my Aphogee leave -in. Detangling was a breeze.
Then I air dried. Lots of frizz going on. At this part of the air drying I added my Elasta QP Olive Oil & Mango Butter moisturizer and my Biolage Hair Milk which helps tame down the frizz.
About 80% air dry I blow dried on cool air, I applied grapeseed oil then flatironed.Grapeseed Oil is good to be used as a heat protectant. And here's the end result. Not bad right?
So I used the CON Nourishing Conditioner, my last wash I let the conditioner sit in my hair a bit while I got so fresh and so clean. Rinsed with coolish-warm water.
Aphogee Keratin & Green Tea Leave In (my hair loves this)
Jamaican Black Castor Oil for my scalp.
My hair was amazingly soft almost like baby hair soft. I thought I was Indian for a second. lol. It was soooo manageable, and I have a lot of new growth happening. I added some aloe vera juice and my Aphogee leave -in. Detangling was a breeze.
Then I air dried. Lots of frizz going on. At this part of the air drying I added my Elasta QP Olive Oil & Mango Butter moisturizer and my Biolage Hair Milk which helps tame down the frizz.
About 80% air dry I blow dried on cool air, I applied grapeseed oil then flatironed.Grapeseed Oil is good to be used as a heat protectant. And here's the end result. Not bad right?
Wednesday, April 18, 2012
Faster Hair Growth Secrets......When I say HAIR you say FINITY !
www.hairfinity.com was the site I used for research in the very beginning of my hair journey. It can be overwhelming when you enter the hair journey game and this site got me on track on exactly what I needed to know and do to start. Hairfinity is basically a site that promotes hair vitamins, but they have tons of great info on hair care, hair regimens and products. I actually take their hair vitamins and I must say within a month's time of taking them I saw improvements with growth. The vitamins are packed with everything your hair needs to maintain healthy hair. Of course, a good regimen, healthy diet and the vitamin gives you the maximum potential to have healthy hair. Other good vitamins for healthy hair are Biotin, B-Vitamins, Prenatal Vitamins, Geritol.
Another plus about this site is they have a custom hair regimen survey, so if you are just starting out on your hair journey and need some help with figuring out what your hair needs for starters. Simply, take the custom hair regimen on the hairfinity site. You answer a few quick questions about the condition of your hair and the products you are using. It will process your answers and send you a recommended hair regimen and a list products directly to your email. By doing this survey was how I was able to create my regimen.So if you need some ideas on how to build a good regimen for your hair these are some basic steps that you can help get you going to faster growing, healthier hair.
Pre-Washing
Pre-wash weekly with a good oil product. Organic Virgin Coconut oil is the best pre-shampoo because it actually penetrates the hair, unlike most oils which only coat the hair. You can use this oil like a hot oil treatment, covering with a plastic cap for 30 minutes without heat (or 15 minutes with heat). Then continue to wash hair with a gentle shampoo.
Washing
Wash weekly with a gentle shampoo. Only wash and rinse once. Over washing can cause a dry condition, which will ultimately lead to breakage. While washing, massage your scalp. This will reawaken sleeping follicles and promote thicker healthier hair.
Conditioning
You need two types of conditioners: one for protein, and the other for moisture and sealing. Or, alternatively you can have only one conditioner, and add an egg when you want to do a protein treatment. You must do deep conditioning with both separately. First, apply the protein treatment. After allowing the recommended elapsed time and following the manufacturer’s instructions, rinse your hair. Second, apply the moisture treatment following the instructions and rinse. If you have done a pre-shampoo treatment, you may not need to deep condition with the moisture. Instead, you can leave in for about 5-10 minutes to seal the cuticle.
Applying the protein treatment:
The best way to apply the protein treatment is with an applicator brush. You must apply the treatment to the entire hair shaft from roots to ends. Pay attention to the ends, so they will not be left untreated. Cover your head with a plastic cap. If you are using an egg treatment, you should not apply heat. Leave in hair for 60 minutes, covered. Then rinse, shampoo, and condition as ususal. If you are using a protein product , and apply heat with a hooded dryer (medium heat) for 15 minutes. Do not use a blow dryer.
Applying the moisture treatment:
Like the protein treatment, the moisture treatment should be applied with an applicator brush paying close attention to the ends. Cover with a plastic cap and apply heat with a hooded dryer (medium heat) for 15 minutes. Once again, do not try to substitute the hooded dryer with a blow dryer. It will not have the same effect. If you have done a pre-shampoo treatment, you can skip the moisture treatment. In this case, you would apply your conditioner and leave for 5-10 minutes, then rinse.
Relaxing
Now this is where all of your washing and conditioning treatments can either pay off or be sabotaged by damage. First of all, do not relax your hair more than once a month. Be careful not to relax hair “bone straight.” This robs the hair of its natural elasticity and causes it to break easily. Assess your hair before attempting to relax it. It may only need to be washed, moisturized, and straightened with a heat tool. If you must relax it, choose a mild relaxer.
Applying the relaxer:
It is best to have someone else apply the relaxer because they have a full view of your head. Before you begin, rub a generous amount of scalp protectant in your hands and apply to the entire hair shaft. Petroleum jelly can be used. Pay close attention to the ends of your hair when applying the protectant. This is to protect hair that has already been processed. Next, apply the relaxer using the manufacturer’s directions. Follow the timing chart so you do not over process your hair. Be sure to wash out all of the relaxer with warm water. Apply a neutralizing shampoo and wash and rinse at least three times. If there are still traces of relaxer in your hair, continue to ash until all traces have been removed. Once all traces of relaxer have been removed, apply the neutralizing shampoo to the hair again. Leave the neutralizer in for 10 minutes. It is very important that you leave the neutralizer in for 10 minutes. Do not skip this step. Next, the neutralizer can be rinsed. Now you can apply the protein treatment, and then follow with the moisture treatment as previously discussed.
Daily Maintenance
Your hair needs to be moisturized daily. You will need two different types of moisturizers: water based and oil based.
Water Based Moisturizer penetrates the hair shaft, oil based moisturizer coats the hair shaft (and seals moisture in or out). To use the two effectively, you will need to apply your water based moisturizer first, then the oil based. The reason for this is that oils and other moisturizing products that contain petrolatum, lanolin, and mineral oil do not moisturize your hair effectively. Instead they seal moisture in or out of your hair. They should only be used to seal the hair and add shine. Try appling your oil moisturizer after rinsing the moisture treatment to combat dryness.
Also, to help with dryness, you need a penetrating moisturizer. The only oil that penetrates the hair shaft is coconut oil. Other oils only coat it. You can use virgin coconut oil as a daily moisturizer or a water based moisturizer. Some examples of water based moisturizers are:
Organic Root Stimulator Carrot Oil
Triple Moisture Silk Touch Leave-in
Profectiv Anti-Tangle Leave-in
Profectiv Mega Growth
Cantu Shea Butter Grow Strong
Elasta QP Mango Butter
Cantu Shea Butter Leave-in
Use a light oil moisturizer following the application of these water based moisturizer to seal moisture in the shaft.
Hot curling:
Make sure your hair is properly moisturized before hot curling or using any heat tools. If it sounds like you are scraping your hair when you pull the iron down your hair shaft, then it is too dry. The iron should glide down the hair, and curls should be defined without using spritz or hairspray. Do apply spritz to hair before using heat tools because it will dry hair out and cause breakage. Curl hair section by section and leave curls undisturbed. Then spray a light finishing spray all over (lightly). Still, leave the curls undisturbed for at least five minutes, then style.
Braids, weaves, etc.:
False braids, waves, and even wigs can cause hair breakage. The chemicals used to make the hair can cause damage to your hair. Your hair rejects foreign substances much like every other part of your body. Also, the products will sometimes cause you to neglect your own hair and the dry condition will lead to more breakage. If you are going to war a wig for a special occasion, make sure that you moisturize your hair first, wrap it, and put on a wig cap. However, wearing wigs daily is not recommended.
Weaves not only break your hair because of the chemicals in the false hair mixing with your own hair, but he glue used to apply then pull your hair from the roots. It cannot be emphasized enough that these products will damage your hair, so steer clear of these.
Products
1. Essentious Shampoo, Mizani Botanifying Shampoo, or any shampoo that does not contain harsh sulfates (Gentle Shampoo)
2. Essentious Protein Treatment, Any regular conditioner with an egg added, Mizani Kerafuse Intensive Strengthening Treatment (Protein Treatment)
3. Essentious Moisture Treatment, Mizani Moisturefuse Moisturizing Conditioner, or Organic Virgin Coconut Oil (Moisturizing Treatment)
3. Organic, Virgin Coconut Oil (Pre-shampoo Treatment)
4. Mizani Phormula-7 Neutralizing / Chelating Shampoo (Neutralizer)
5. DOO GRO Stimulating Growth Oil ( Oil Based Moisturizer)
6. Organic Root Stimulator Carrot Oil (Water Based Moisturizer)
How to Grow Black Hair Its Longest
First of all, your hair care regimen should be as "hair friendly" as possible. That means you should be following the steps outlined above to minimize breakage. Second, you should increase your anagen (growth phase) which will allow you hair to grow much longer before it enters the resting and shedding phases. One way to do this is to incorporate vitamins for hair growth in your diet. (Another way to do this is to become pregnant. While a woman is pregnant, all of her hair is locked in the growth phase. That is why a woman's hair will grow thicker and longer while she is pregnant.) Third, you need to address any hair problems that could be limiting your hair growth. A Microscopic Hair Analysis can address problems that would otherwise be overlooked.
Hope this was helpful!
Wednesday, April 11, 2012
It's All About the Pre-Poo..Boo!
| My pre-poo products |
If you don't know what a pre-poo is. It's the pre-treatment you give your hair before you wash it. You can either use a conditioner or oils or both. You apply to dry hair, sit under some heat for 30mins - 1 hour.
I do a pre-poo mix with an inexpensive conditioner, right now, I'm using Tresemme Naturals. I mix that with honey, coconut oil, olive oil and garlic water. I don't do exact measurements I just eyeball everything. It smells a bit weird but my hair loves it. I realized after reading the ingredients that the Tresemme Natural Conditioner has protein in it, which is why my hair seems so strong lately.
Here's the breakdown of each product of my pre-poo to give you an idea of where the love is:
Tresemme Vitamin A& C Natural Conditioner -- Patented formula enriched with Vitamins C & E along with a fortifying blend of plant derived extracts.
Honey - Honey contains both fructose and glucose, natural sweeteners that nourish the hair. Honey also retains water and moisture, allowing it to hydrate hair while providing vitamins and minerals such as copper, iron, manganese, calcium, sodium, potassium, phosphorous and Vitamin B
Coconut Oil - Using coconut oil as pre-shampoo treatment is better than using it post-wash. This is partly owing to the fact that coconut oil only seems to penetrate wet hair fibers.
Olive Oil - olive oil can nourish, condition, and improve the strength and elasticity
Garlic Water - I buy minced garlic in a jar and take a tsp of the water and add to my pre-poo mix. Garlic is known to fight against shedding.
I've also pre-poo'd with just coconut oil and my hair also had great results--soft and well-moisturized.
I'm still learning this whole Hair Journey thang, but I will say that pre-pooing will ALWAYS be part of my regimen because of the benefits and results of how well my hair is doing. As I go further along in my HJ, I'm sure my ingredients will change but pre-pooing and my hair will never part.
This blog was one of my go-to resources on learning about healthy hair practices. http://relaxedhairhealth.blogspot.com/2010/12/pre-poo-101-why-you-must-do-this-every.html. Check it out! She does a great break down of pre-pooing.
What's in your pre-poo?
Subscribe to:
Posts (Atom)